
Table of Contents
- 1. Start With Planning and Preparation for Your Estate Cleanout
- 2. Create an Estate Cleanout Timeline and Divide Work Into Phases
- 3. Coordinate With Family Members and Assign Clear Responsibilities
- 4. Use an Estate Cleanout Checklist to Sort Room by Room
- 5. Avoid Common Estate Cleanout Mistakes to Avoid Delays and Costs
- 6. Arrange Dumpster Rental for Estate Cleanout Debris Removal
- 7. Manage the Emotional and Physical Demands of the Process
- Frequently Asked Questions
Last Updated: October 17, 2026
1. Start With Planning and Preparation for Your Estate Cleanout
To manage estate cleanouts effectively, you need a major project plan. It requires clear thinking before you start moving boxes. At Austex Dumpsters, we help homeowners tackle these projects with confidence and efficiency.
The first step is to assess the full scope of work. Walk through the entire property. Make notes about which rooms need attention and what types of items fill each space. This gives you a realistic picture of the timeline and resources you’ll need.
Next, gather your team. Decide who will lead the project and who will help. Assign roles early. Some people work better sorting items, while others handle logistics or emotional decisions. Clear roles prevent confusion and conflict later.
Create a basic inventory as you plan. List major items like furniture, appliances, and collections. Note rooms that contain sensitive materials like important documents or valuables. This inventory becomes your roadmap.
Finally, set a realistic budget. Estate cleanouts involve disposal costs, potential professional help, and sometimes unexpected repairs. Understanding your budget upfront prevents surprises.
Start your planning on a calm day when you have time to think clearly. Rushing through this phase leads to costly mistakes and missed opportunities to sell valuable items.
2. Create an Estate Cleanout Timeline and Divide Work Into Phases
A strong estate cleanout timeline prevents overwhelm and keeps momentum going. Break the project into phases instead of trying to do everything at once.
Phase one focuses on planning and preparation. Gather supplies, confirm your team, and document the property. This phase takes one to two weeks for most estates.
Phase two involves sorting and organizing. Work room by room. Decide what stays, what sells, what donates, and what gets discarded. This is the longest phase and typically takes two to four weeks depending on property size.
Phase three handles removal and disposal. Arrange for professional hauling if needed. Schedule your dumpster rental for estate cleanout debris. Coordinate pickup times for donated items.
Phase four is final cleanup and closure. Deep clean the property, handle any remaining tasks, and confirm all documents are secure.
Build in buffer time between phases. Unexpected items always surface. Family members may need extra time to decide on sentimental pieces. A realistic timeline reduces stress and improves decision-making.
| Phase | Focus | Typical Duration | Key Tasks |
|---|---|---|---|
| Planning | Assessment & prep | 1-2 weeks | Inventory, team setup, budget |
| Sorting | Room-by-room organization | 2-4 weeks | Categorize items, valuations |
| Removal | Hauling & disposal | 1-2 weeks | Dumpster rental, donations, sales |
| Cleanup | Final tasks & closure | 3-5 days | Deep clean, document security |
A phased approach prevents burnout and lets you make better decisions about each item instead of rushing through the property.
3. Coordinate With Family Members and Assign Clear Responsibilities
Family coordination makes or breaks an estate cleanout. Unresolved disagreements about what to keep or sell create delays and tension.
Start with a family meeting before work begins. Discuss the overall goals, timeline, and decision-making process. Be explicit about which items are negotiable and which are already decided.
Assign specific responsibilities to each person. One person might handle documents and valuables. Another manages the donation coordination. A third oversees the disposal logistics. Written assignments prevent duplicate work and confusion.
Create a simple decision framework for disputes. If two family members disagree about an item, use these rules: sentimental items go to whoever has the strongest emotional connection, valuable items get appraised and divided fairly, and uncertain items get photographed and offered to all family members before disposal.
Hold regular check-ins. Weekly meetings prevent small disagreements from becoming major conflicts. They also keep the project moving forward.
Document decisions in writing. Take photos of valuable items and note who gets what. This creates a clear record and prevents misunderstandings later.
Unresolved family disagreements about estate items are the #1 reason cleanouts stall. Set your decision framework early, even if it feels awkward. Clear rules prevent resentment.
4. Use an Estate Cleanout Checklist to Sort Room by Room
A room-by-room approach makes the estate cleanout checklist manageable. Tackling the entire property at once feels overwhelming. Breaking it into smaller units keeps you focused and motivated.
Start with less emotional rooms like the garage or basement. These spaces build momentum without the heavy emotional weight of bedrooms or offices.
Separate Items: Keep, Sell, Donate, Recycle, or Discard
Create five clear categories for every item you encounter. This prevents decision paralysis and keeps the sorting process moving.
Keep items go to family members or storage. These are sentimental pieces, valuable heirlooms, or items the estate needs to retain.
Sell items have genuine resale value. Furniture, jewelry, collectibles, and electronics often sell quickly online or through local buyers. Research values before deciding. An item worth $500 deserves more effort than one worth $20.
Donate items are usable but have limited resale value. Clothing, books, household goods, and furniture in good condition find homes through charities. Many organizations offer free pickup for larger items.
Recycle items include paper, cardboard, metal, and plastics. Separate these from trash to reduce disposal costs and environmental impact.
Discard items are broken, contaminated, or unusable. These go into your dumpster rental for estate cleanout debris.

Secure Important Documents and Valuables
Critical documents require special handling. Locate wills, deeds, insurance policies, tax records, and financial statements immediately. Store these in a secure location separate from general sorting.
Fill Out Form to Request Dumpster Rental →
Valuables like jewelry, collectibles, and artwork need protection. Consider photographing high-value items and storing images securely. Get professional appraisals for items worth more than $1,000.
Create a master list of all documents and valuables. Include their location, condition, and intended recipient. This prevents items from getting lost during the chaos of sorting.
Use a dedicated folder or safe for documents. Digital copies stored in a secure cloud service provide backup protection in case of loss or damage.
5. Avoid Common Estate Cleanout Mistakes to Avoid Delays and Costs
Learning from others’ mistakes saves time and money. The most common estate cleanout mistakes to avoid follow predictable patterns.
Mistake one: Starting without a plan. Diving into sorting without clear goals leads to chaos. You end up making the same decisions repeatedly and wasting effort.
Mistake two: Overestimating what you can sell. Most household items have minimal resale value. Spending weeks trying to sell items worth $5 each wastes time better spent on actual estate management. Focus only on items with clear value. Prioritizing high-value assets prevents the emotional and physical exhaustion that often accompanies the broader process to clear out parents’ house.
Mistake three: Keeping too much. Emotional attachment makes it hard to let go. Items pile up in storage, creating ongoing costs and clutter. Be honest about what you’ll actually use.
Mistake four: Neglecting important documents. Lost deeds, insurance policies, or financial records create serious problems. Secure documents first, before sorting anything else.
Mistake five: Underestimating the timeline. Estate cleanouts take longer than expected. Family disagreements, unexpected discoveries, and emotional processing all add time. Build in extra buffer weeks.
Mistake six: Skipping professional help when needed. Some situations require experts. Hazardous materials, specialized collections, or large properties benefit from professional assessment. Trying to handle everything yourself often costs more in the end.
6. Arrange Dumpster Rental for Estate Cleanout Debris Removal
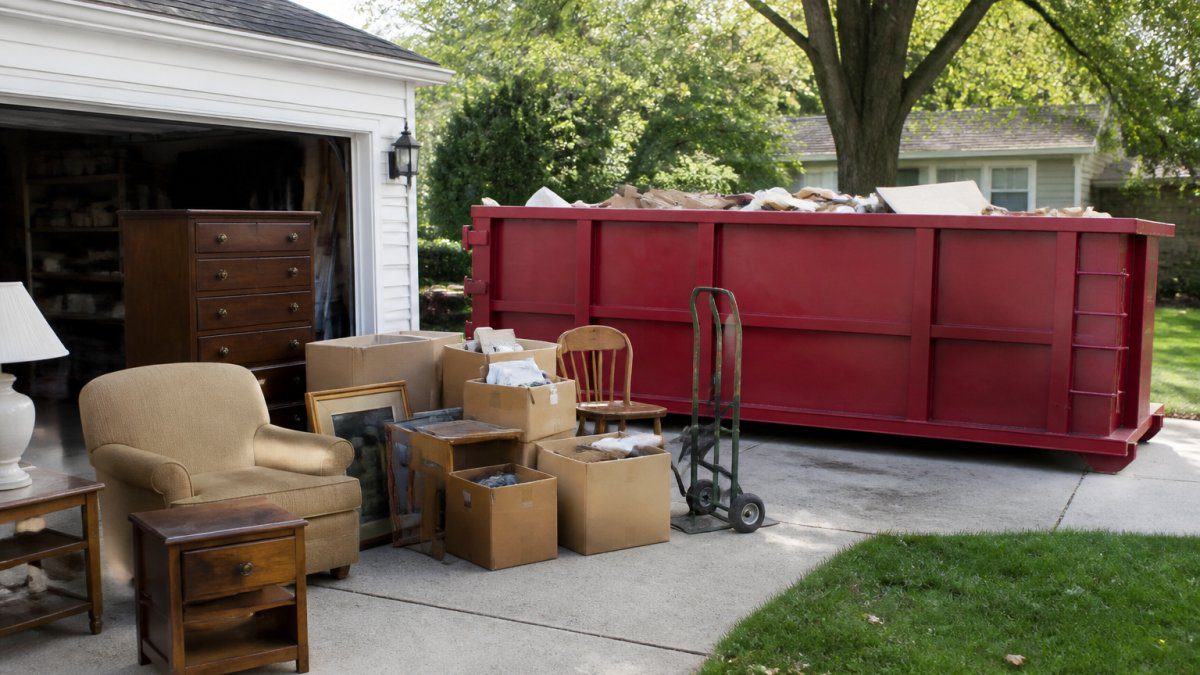
To manage estate cleanouts efficiently, arrange debris removal that keeps your project on track. A dumpster rental for estate cleanout provides a central collection point for items heading to disposal.
Austex Dumpsters offers roll-off dumpsters in four sizes: 15-yard, 20-yard, 25-yard, and 30-yard. The right size depends on your property and the amount of debris you’re removing.
A 15-yard dumpster works well for smaller estates, single rooms, or light debris. However, large amounts of heavy material such as concrete, dirt, brick, or rock must go in a 15-yard dumpster. If you’re clearing a basement with old brick walls or removing landscaping stones, the 15-yard is your best choice. Customers may receive a break on tonnage when a 15-yard dumpster is filled with clean concrete, dirt, brick, or rock with no trash or other contamination.
A 20-yard dumpster handles medium-sized estates with mixed debris. A 25-yard dumpster works for larger properties or estates with significant amounts of furniture and household items. A 30-yard dumpster is best for major cleanouts involving entire properties.
Austex Dumpsters provides expert guidance on sizing. We ensure you get the right container for your specific project, preventing overage fees and delays. Same-day delivery is available when you need to start immediately.
Call Austex Dumpsters early in your planning phase. Our team can assess your project and recommend the right dumpster size, preventing costly mistakes and project delays.
7. Manage the Emotional and Physical Demands of the Process
Estate cleanouts involve more than logistics. The emotional weight of sorting through a lifetime of possessions affects everyone involved.
Acknowledge the emotional demands upfront. Going through someone’s belongings triggers memories and grief. This is normal and expected. Don’t rush the process or shame people for feeling emotional about items.
Take regular breaks. Sorting for eight straight hours exhausts both body and mind. Work in two-hour blocks with breaks between. This maintains focus and decision-making quality.
Share the physical load. Lifting heavy furniture, climbing stairs, and moving boxes strains your back and joints. Rotate tasks. Take turns with the physically demanding work. Consider hiring help for heavy lifting if needed.
Create small moments of connection. Share stories about items you find. Laugh about discoveries. These moments ease the emotional burden and build family bonds.
Watch for decision fatigue. After making dozens of choices, your judgment weakens. This is when people keep too much or make hasty decisions they regret. Take a break when you notice decision fatigue setting in.
Remember that you don’t have to decide everything immediately. Items can sit in “undecided” boxes for a few days while emotions settle. Some decisions become clearer with time and perspective.
Managing an estate cleanout requires planning, coordination, and realistic timelines. The process is both logistically complex and emotionally demanding. Austex Dumpsters helps you handle the disposal side efficiently. Our expert guidance on dumpster sizing and same-day delivery options keep your project moving forward without delays or surprises. Learn more about estate planning from the National Association of Estate Planners & Councils to understand the broader context of estate management. When you’re ready to arrange debris removal, contact Austex Dumpsters for a quote on the right dumpster size for your specific estate cleanout needs.
Frequently Asked Questions
Where should you start when cleaning out an estate?
Begin by gathering important documents like wills, deeds, and insurance records with an estate attorney or accountant if needed. Create a detailed inventory of valuables and sentimental items, then establish a timeline with family members. Start in one room, sort items into categories (keep, sell, donate, recycle, discard), and work systematically through the property. This structured approach prevents overwhelm and ensures nothing important is missed during your estate cleanout.
What should be included in an estate cleanout checklist?
Your estate cleanout checklist should cover securing important documents, identifying valuables and sentimental items, assigning family responsibilities, setting a project timeline with phases, sorting belongings room by room, arranging pickup for donations, planning resale options, scheduling professional cleaning services if needed, and arranging for debris removal. A comprehensive estate cleanout checklist keeps everyone on track and ensures all categories of items receive proper attention and handling.
How long does an estate cleanout usually take?
Most estate cleanouts take 2-8 weeks depending on property size, the volume of belongings, and family coordination complexity. Break the project into phases: planning (1 week), sorting and organizing (2-4 weeks), arranging sales and donations (1-2 weeks), and final cleanup and removal (1 week). Adding a calendar buffer prevents rushed decisions about valuables. An estate cleanout timeline that accounts for bereavement, family disagreements, and logistics prevents costly mistakes and reduces stress on everyone involved.
What size dumpster do I need for an estate cleanout?
Dumpster size depends on the property size and volume of items being discarded. For small estates or single rooms, a 15-yard dumpster works well for general debris. Larger estates typically need a 20-yard or 25-yard dumpster. If you’re removing heavy materials like concrete, dirt, brick, or rock in large quantities, a 15-yard dumpster is required for those materials. Austex Dumpsters offers expert guidance on sizing to ensure you have adequate capacity without overage fees or the need for multiple trips.